Today was the day to solder jumpers onto the ribbon cable connectors for the Thinkpad keyboard. I was very fortunate to have friends over who were also working on electronics-related projects: I borrowed a small vice to hold the connectors while I soldered, a "third hand" (alligator clips mounted on a heavy base to hold things) and - probably most importantly - a Hakko soldering station. I have an old Weller SP-23 soldering iron: it works for basic stuff, but for the fine work it turned out I needed something significantly better, and the Hakko was a wonder.
Which isn't to say that this was easy. Soldering jumper wires onto metal pads that are intended to be soldered to a board rather than to a wire is tricky. When the pads are 1mm apart, it requires a LOT of patience and care. The slightest glob of solder and you're getting out the solder wick and redoing the joint because you've created a short. But it got done in the end ... (about six hours work?)
photo: The slow and precise work of soldering jumpers to pins on 1mm centres
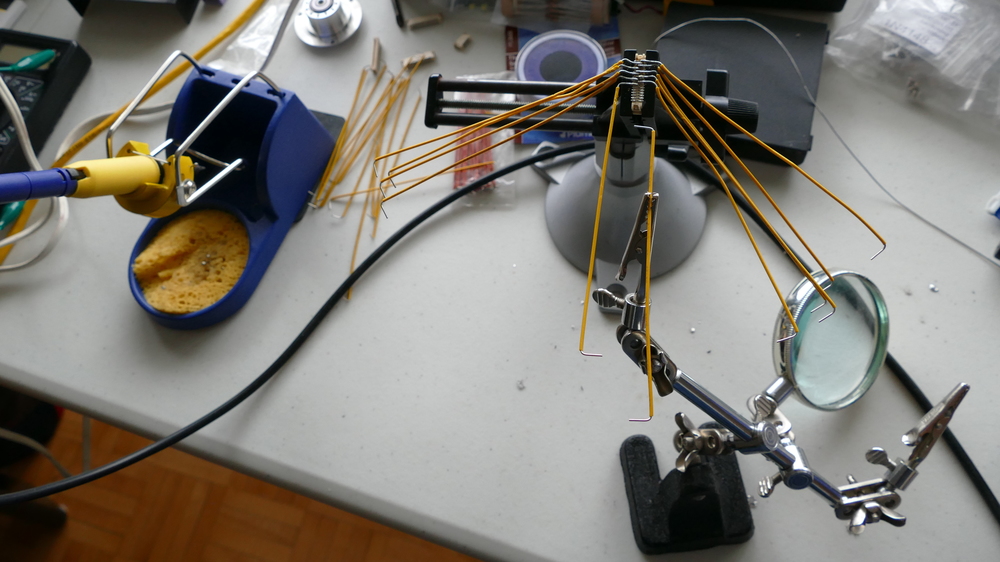
photo: The keyboard with all three modified ribbon cable connectors attached

The next step is to trace the entire keyboard matrix, which will take several hours of work: essentially you connect a continuity tester to two jumper wires, and then press every single key on the keyboard until you get a short. Then you carefully record the key and the two ribbon numbers, move to the next jumper wire, and repeat. For a grid of roughly 12x18.